How to Automate CMS, Plugin and Theme Updates
For every site on your WatchTower dashboard, you can configure and schedule automated updates for the CMS, plugins, and/or themes.
Automating WordPress Updates
- 1
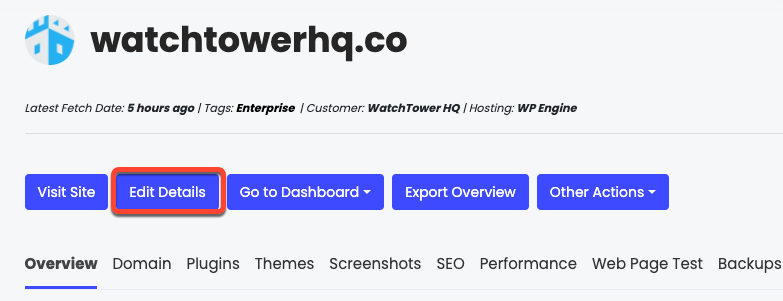
- Go to the Websites page and search for the site you want to enable auto-updates for on the Websites page.
- 2
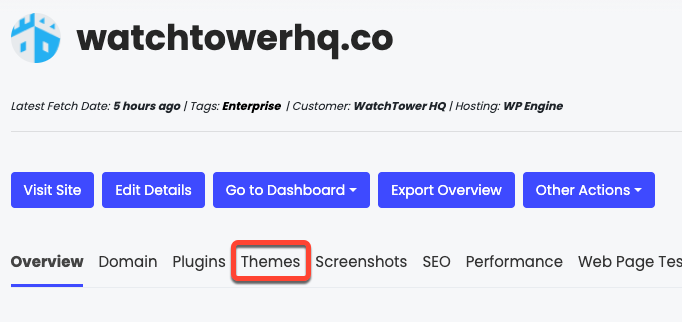
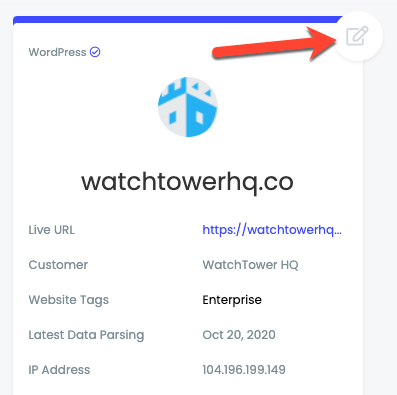
- Click on the pencil and pen button on the upper right corner of the website tile to open the site details.
- 3
- You can also get to this page by going into the site and clicking the "Edit Details" button beneath the site name.
- 4
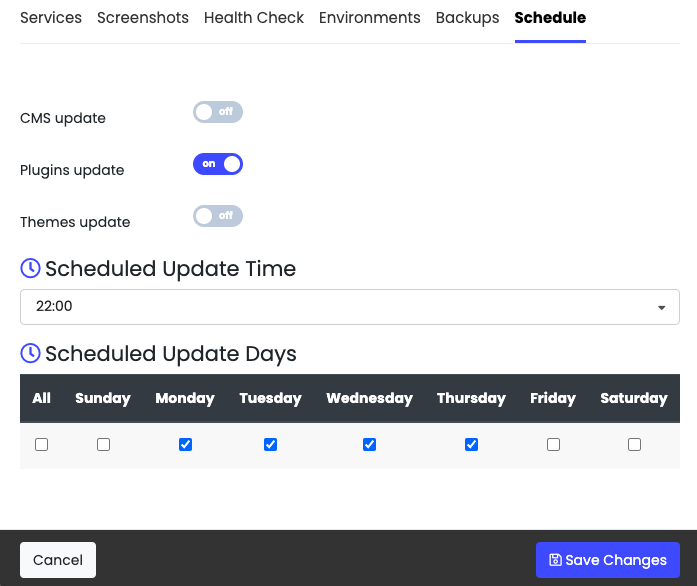
- Once in the site details popup, click on the Schedule tab.
Note: if the website is not WordPress or the WatchTowerHQ agent/plugin is not installed on WordPress, this tab will not be visible.
- CMS update: this will update the WordPress version of your site once it is available on the soonest day checked at the selected time
- Plugins update: this will update plugins with auto-update turned on (see next section) once available on the soonest day checked at the selected time
- Themes update: this will update themes with auto-update turned on (see next section) once available on the soonest day checked at the selected time
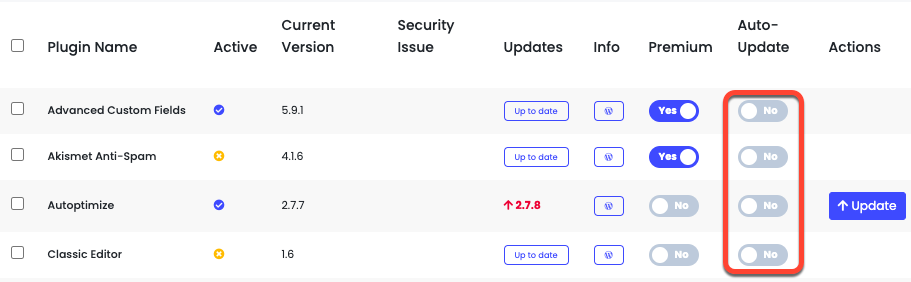
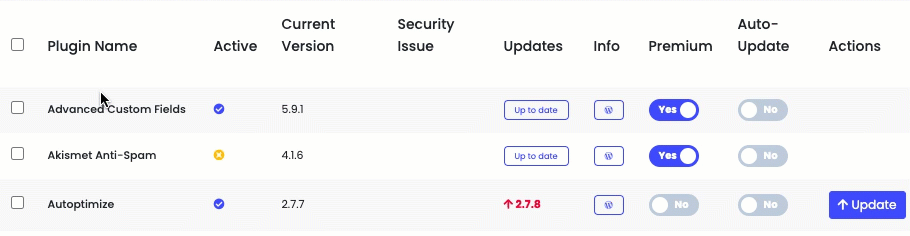
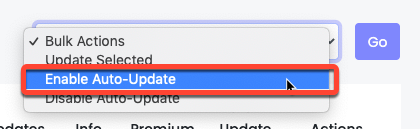
Enable Auto-Updates for Plugins and Themes
If you turned on scheduled updates for plugins or themes, you will have to turn on auto-updates for any or all plugins/themes you wish to be automatically updated on the scheduled date. If you do not, they will not be automatically updated.
For Plugins:
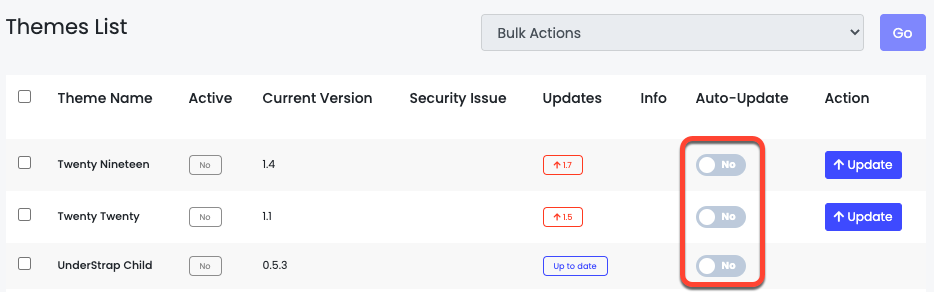
For Themes: